On A Dime - Part 1
why not just make it out of fiberglass dude?
Over the past few weeks months I’ve been working to get Arcadia (Slipper 17 by Starboard Yachts) ready for the water.
I’ve only owned the boat for a year now, and was only able to take it out twice last season. Haven’t even gone on a proper shakedown cruise yet.
When I first bought the boat, I noticed a small shallow crack in the rudder neck. I figured I could V it out later and fill it with epoxy, so I didn’t think much of it at the time.
Winter had other ideas though.
I was getting ready to polish/wax the stern, so I dismounted the rudder and set it aside. Taking the time to examine the crack, I found some Bad News - the crack had grown. A lot. Water probably got in there and froze over the winter.
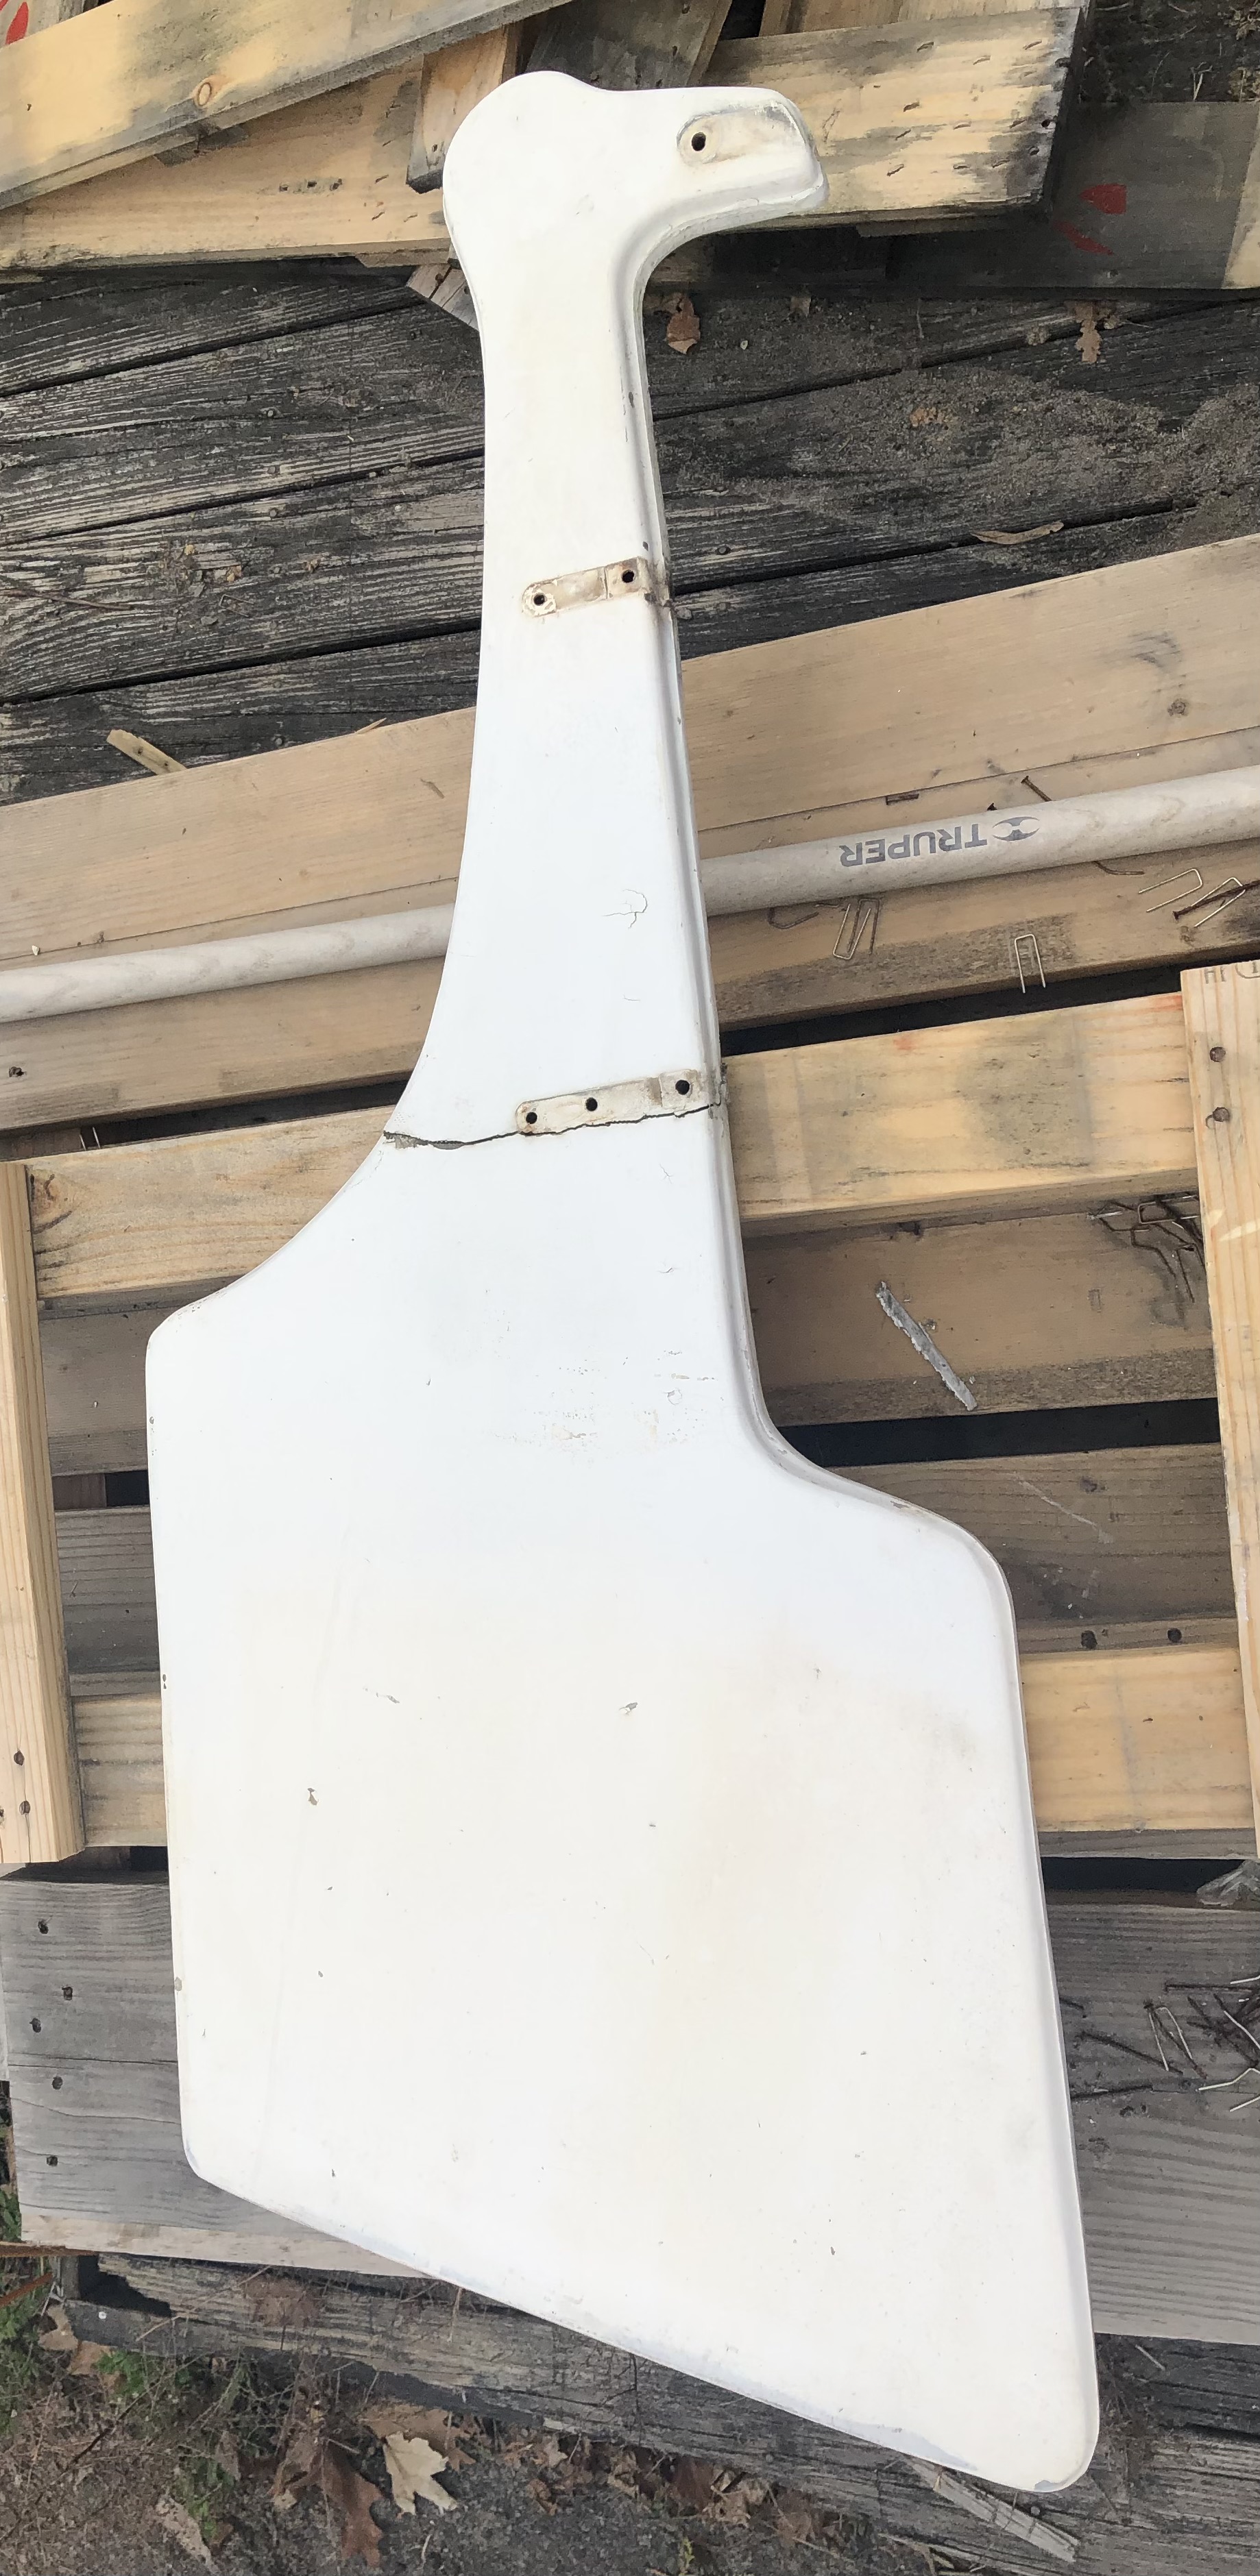
Not the best place for it to nearly break half in two
Lots of googling and forum reading told me three things
- The airfoil shape of the rudder blade is somewhat critical to good performance
- I should make a foam or balsa core and then fiberglass over it
- Another option would be to laminate cedar strips into a thiq blank and cut the rudder from that.
Some more googling brought me to this tool which worked very well to select and plot and print out a profile curve.
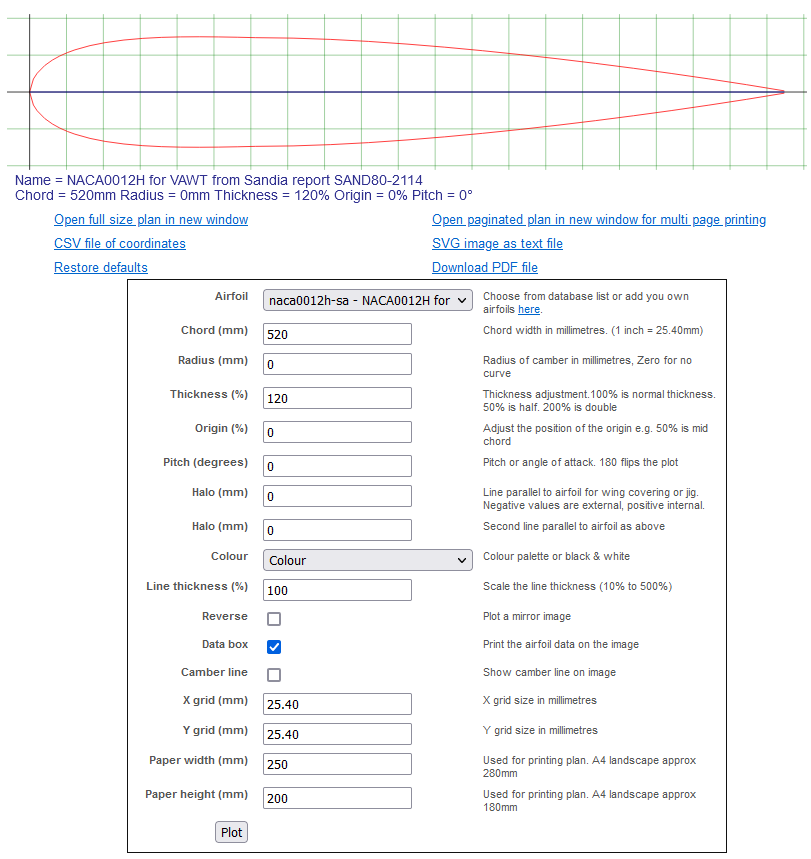
This is what I ended up with, approx 3" thick at the widest
Now, I don’t know fiberglass that well. I’ve never really worked with it before, and I didn’t really want to start now. I’ve never really undertaken any big wood projects either, but the material is much more forgiving.
I had the beginnings of a plan at this point:
- Form a blank out of cedar 2x4’s
- Somehow cut the profile out
- Soak it in penetrating epoxy
- Coat it in regular epoxy
- Coat it in spar varnish for UV protection
Step 1 was easy enough:
- Acquire lumber (ouch my wallet!)
- Chop it up
- Glue it together
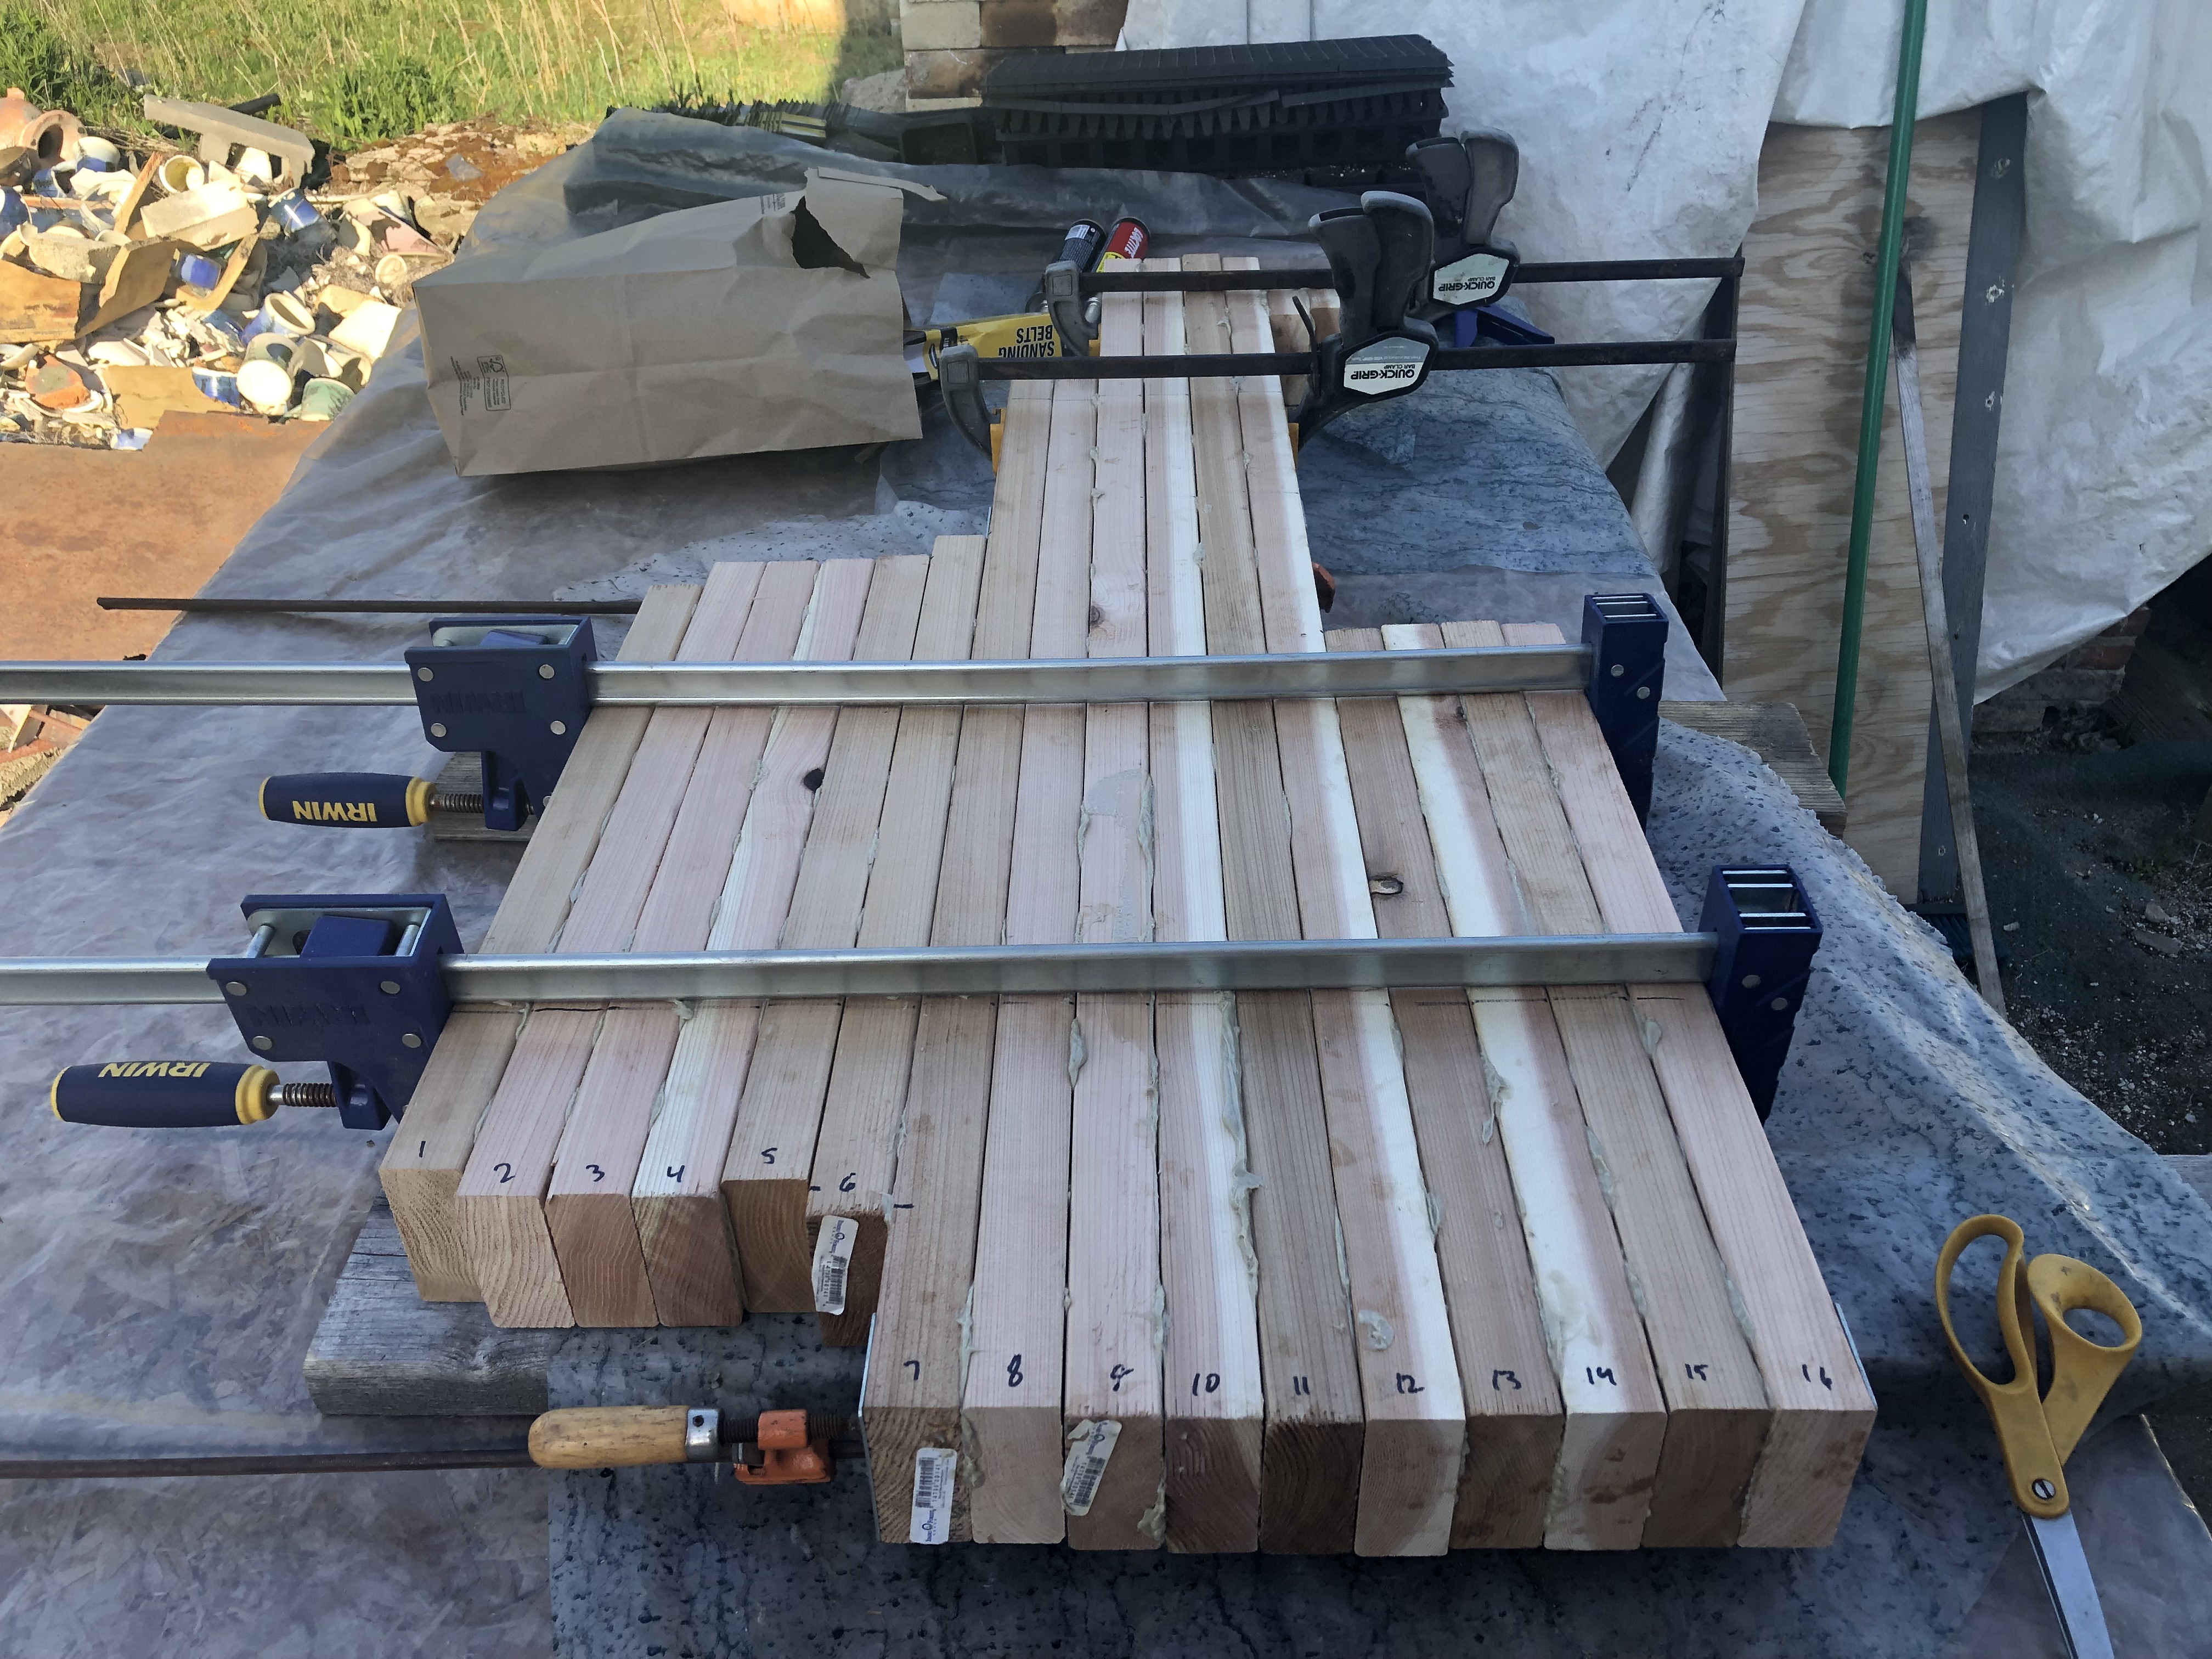
Not as much squeezeout as I’d have liked to see but we’re drowning it in epoxy later on ¯\(ツ)/¯
Step 2 was a little daunting, but after a good sit ’n stink about it I had an idea. With a set of profile guides, I could use bar clamps as rails for a router to slide across the long axis of the blank. This would get me pretty close, and then the rest of it could be sanded / planed away.
First I drew up the fixturing in cad. This proved extremely valuable as I could reference dimensions live as I built the fixture. (It didn’t come to me until halfway through that I would need to mirror the fixture angle to do the other side… I would have designed it a little differently had I realized that.)

Onshape is like solidworks lite, I really like it
After building the fixture I was ready to start router-ing away the bulk of the material to remove. The first few passes were really light, but pretty quickly I was taking very heavy passes. To its credit, the ‘ol Craftsman router did very well.
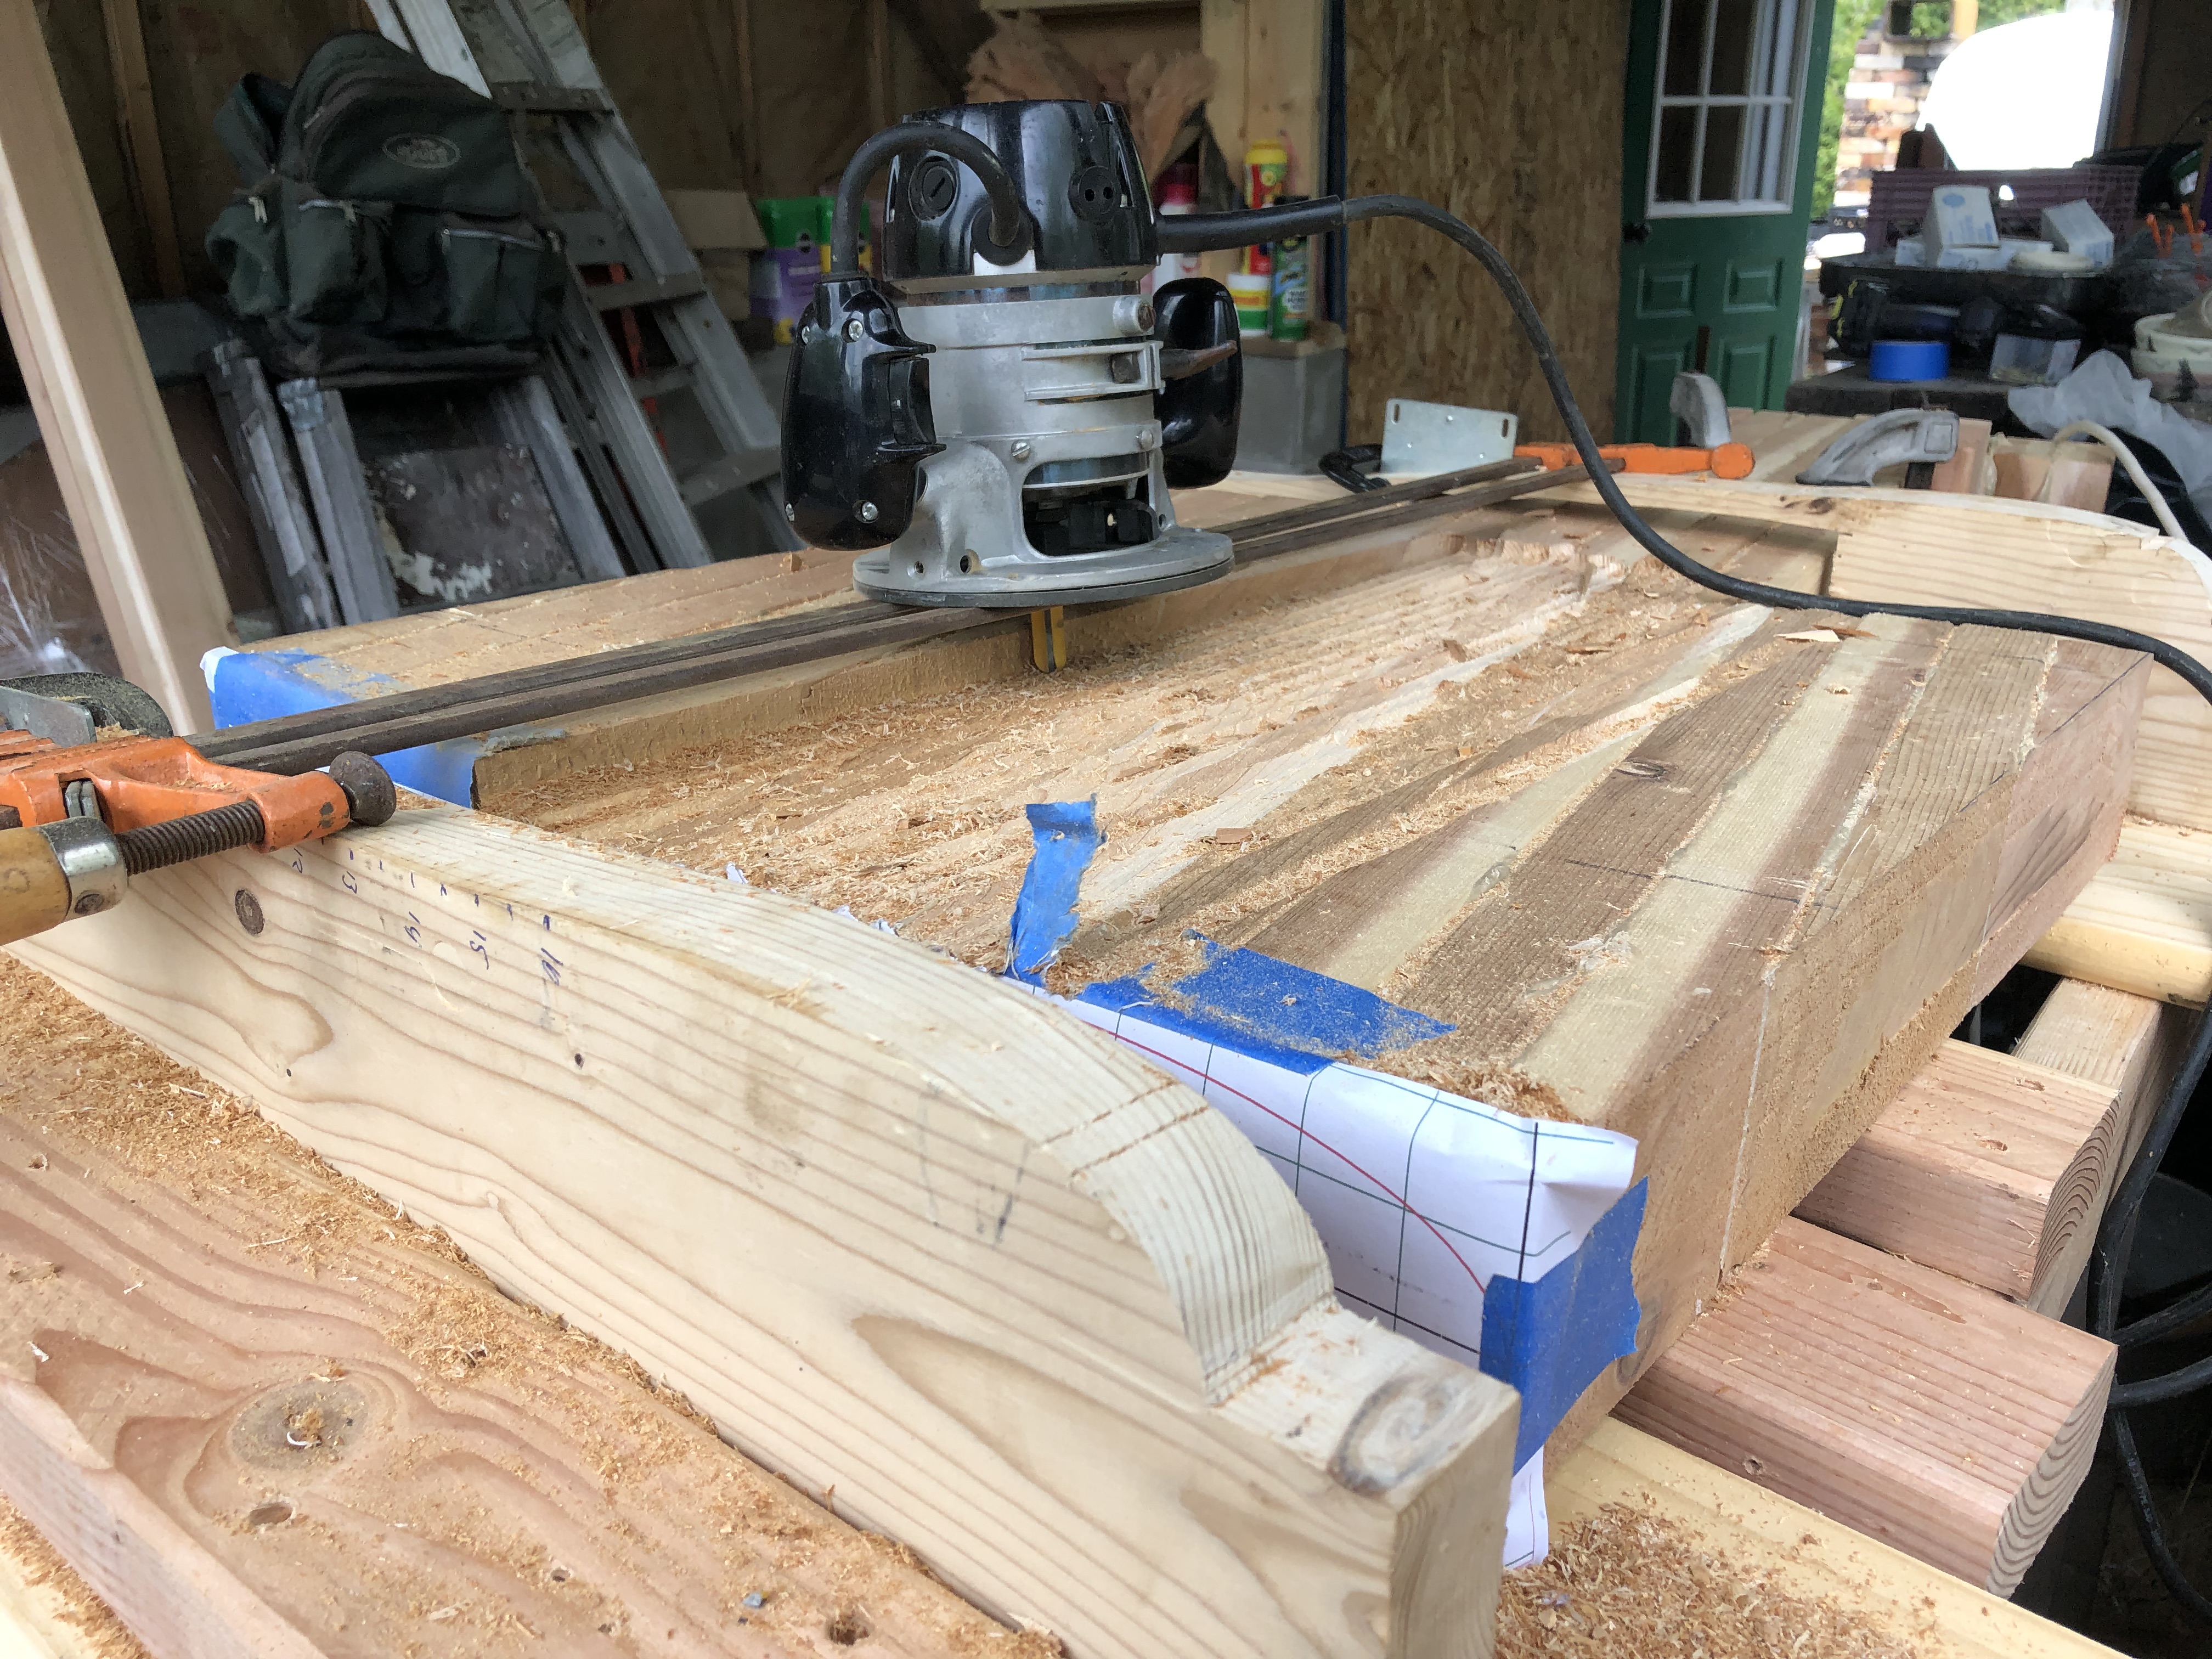
5/8" round nose top bearing carbide bit, 1/2" stepover. Cedar is wonderful to work with.
Some work with the power hand planer brought us to this:
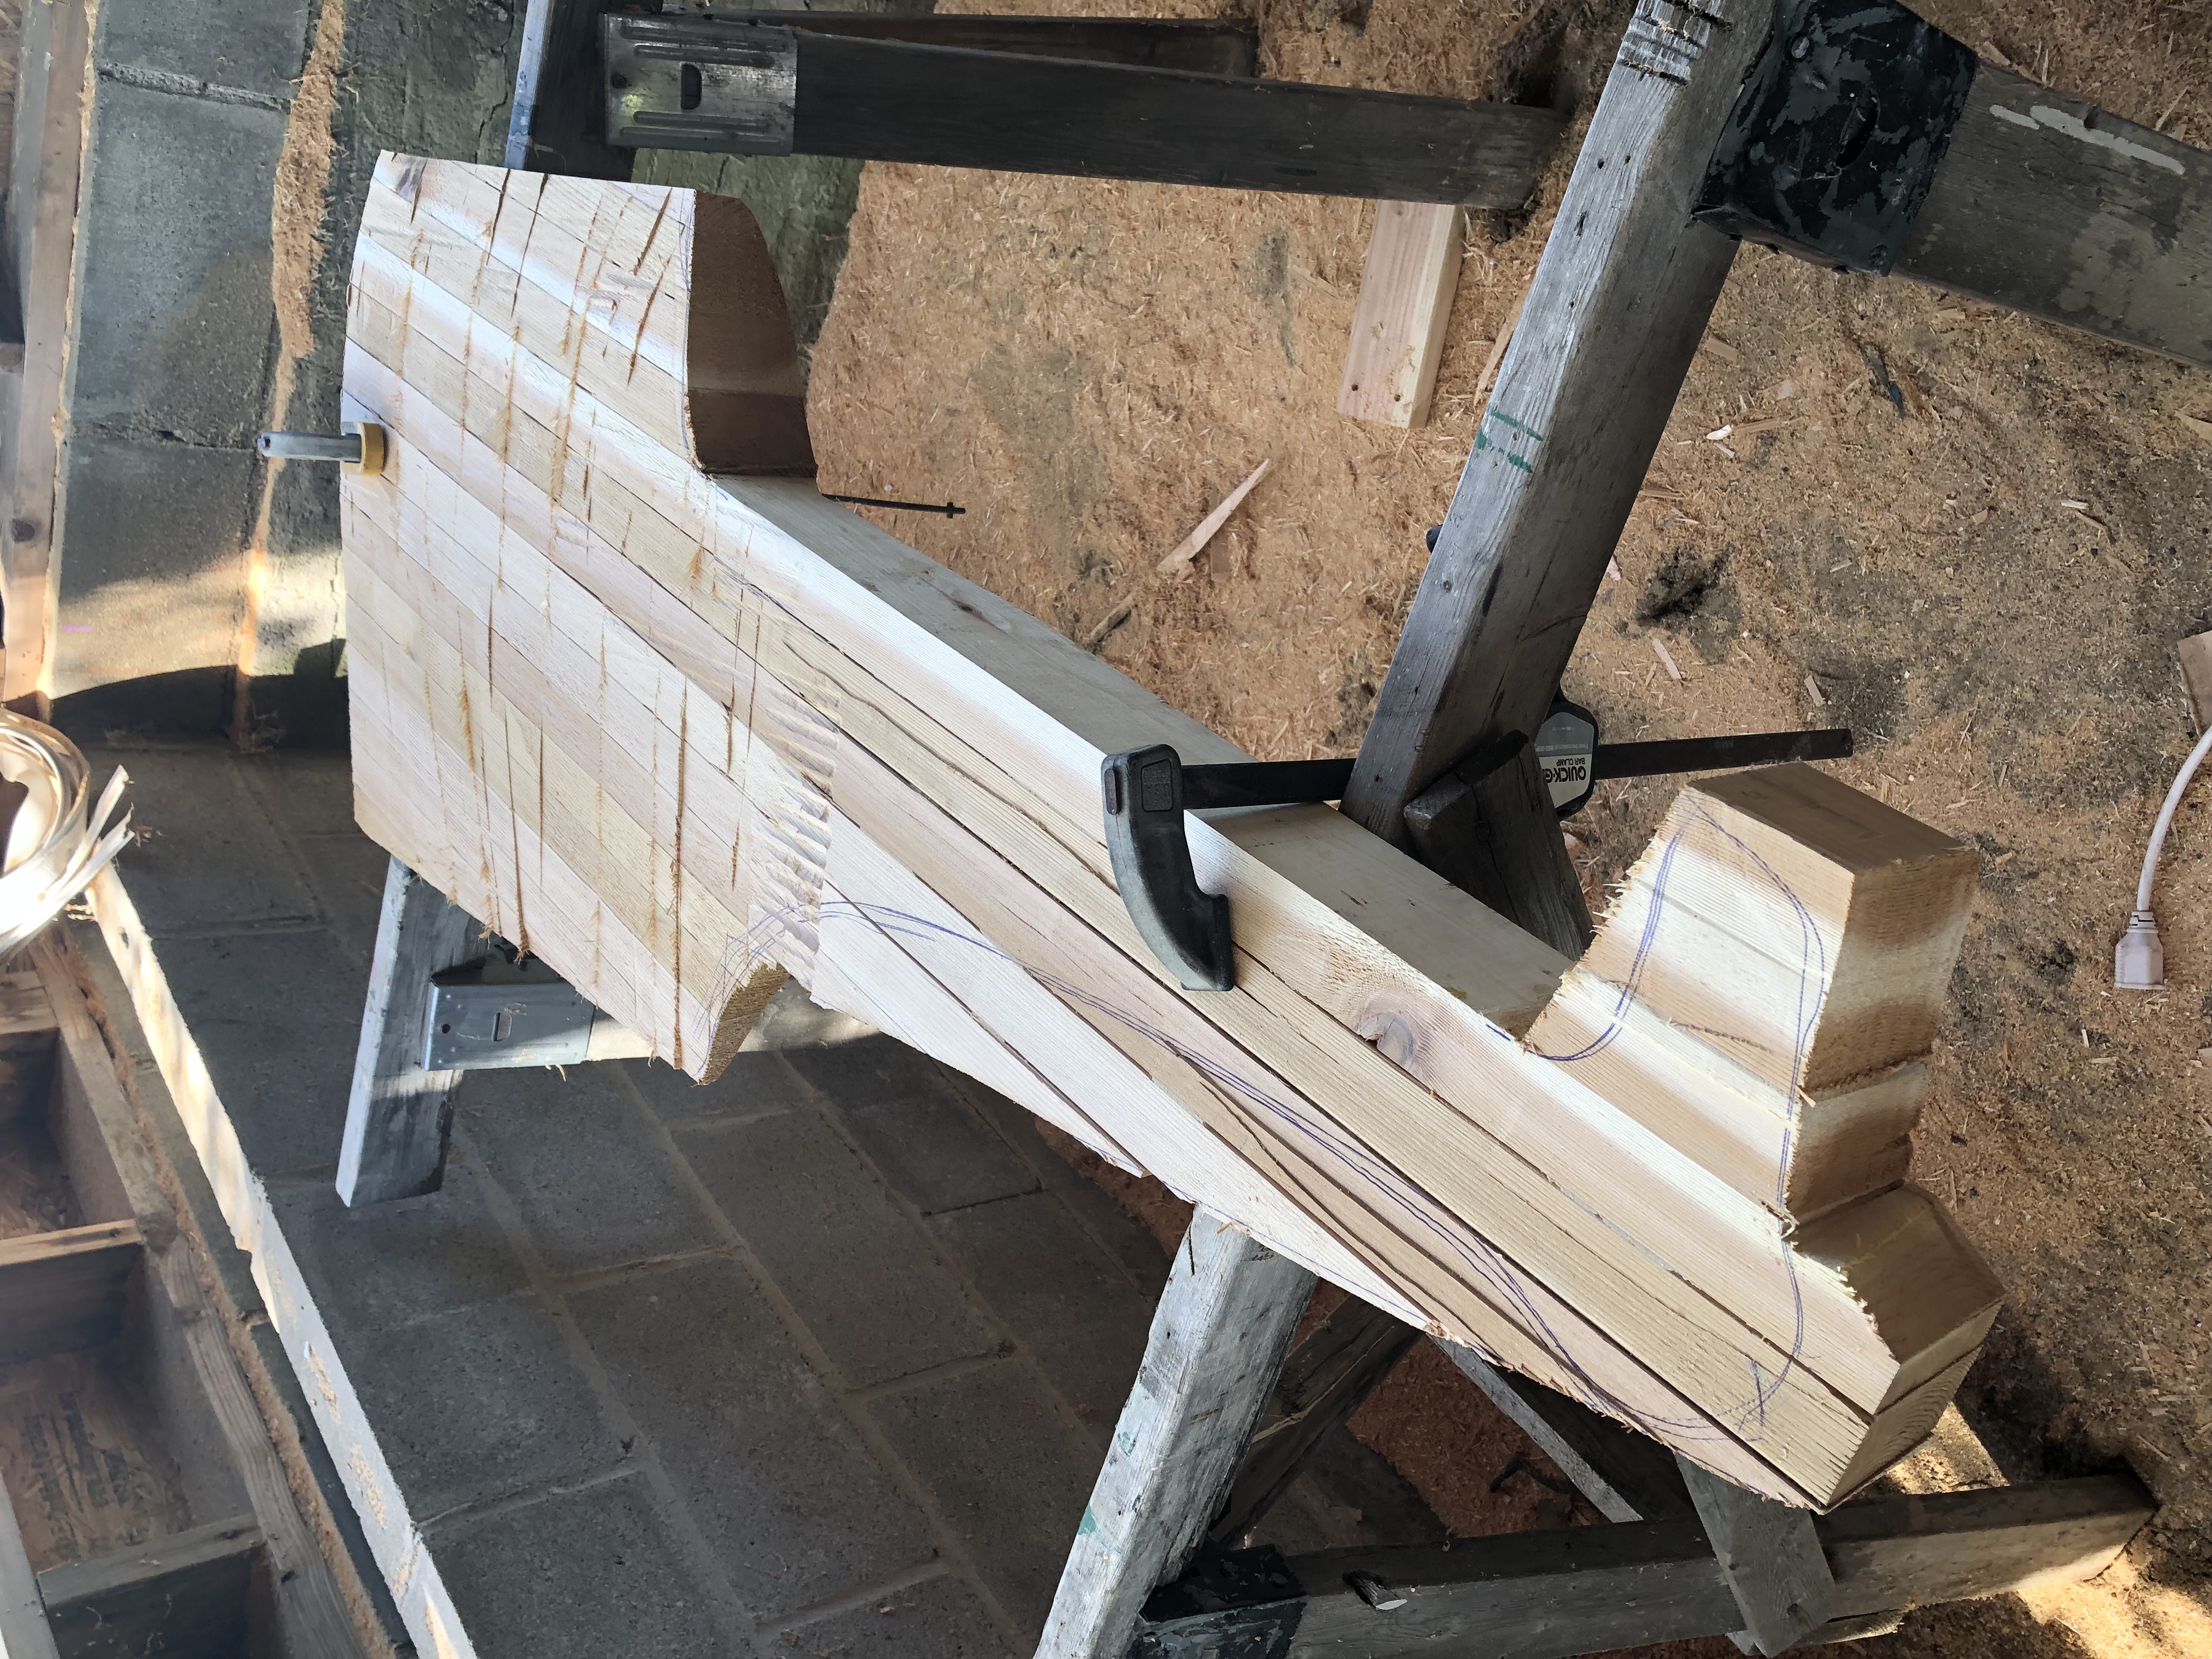
outline of old rudder traced on, will probably make the back edge less swoop-ey
And that’s where I leave you for today.
I still need to finish sanding it to final form. After that comes epoxy.
Lots of epoxy.